Applications
Applications—or more accurately, references to applications—are central to the Lacework Edge Platform. In the Lacework Edge configuration model, an application defines a service, host, subnet, or domain for which you want to manage access with Lacework Edge.
An application can refer to:
- A privately-hosted application (running on-premise or in a cloud environment) or a publicly-available SaaS application
- An individual DNS name, an individual IP, an entire domain, or a network subnet.
- Layer 3 (TCP/UDP) or Layer 4 (HTTP/HTTPS)
- Created using the API/CLI or UI.
You control access to applications with policies. When you create an application using the application wizard, a policy that permits all traffic to the application is created automatically. To limit access, say to prevent users from accessing the application from countries of concern, add a deny policy that specifies the limitation. In this way, you can build the rules and limitations for the application.
Applications List
See the list of controlled applications by clicking Resources > Applications. The list appears as follows:
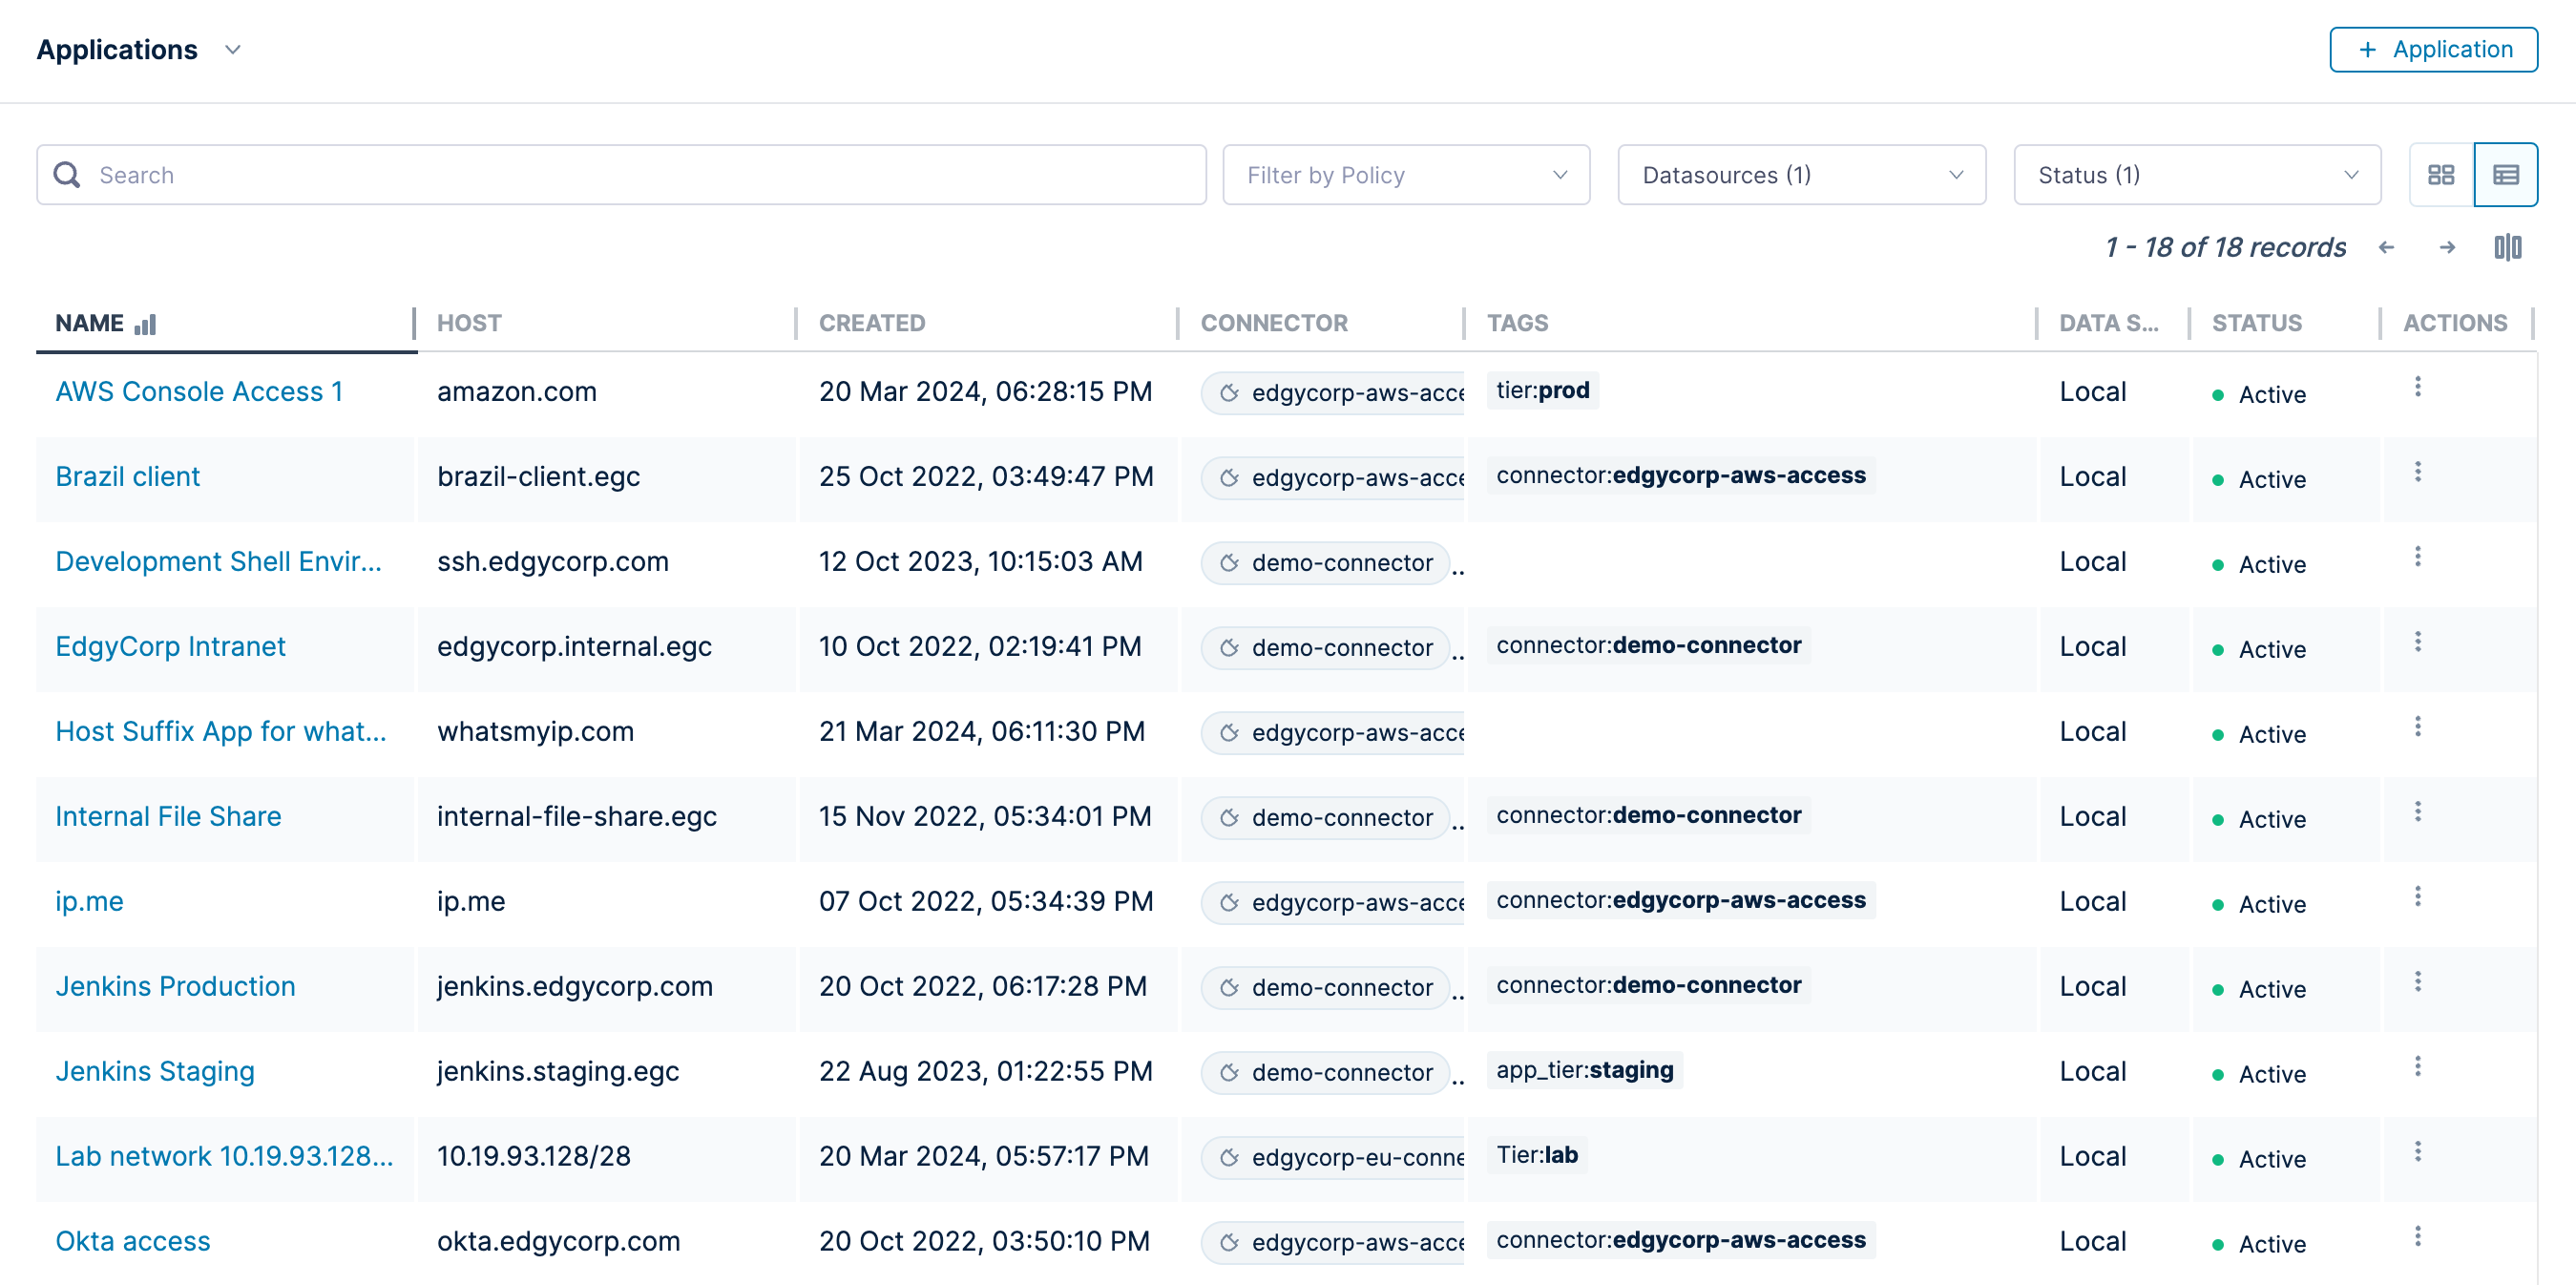
To quickly find an application, start typing the first few characters of the application name in the Search text area. Select the one you're interested in, if present, to view details for the application. You can also filter applications by data source and status by clicking on the buttons to the right of the filter fields.
Creating and Editing Applications
Lacework Edge offers two methods within the UI to create a new Application: the Application Wizard and the manual Create Application dialog. The wizard provides a guided experience, and creates default policies and other related configurations objects for the application automatically.
Lacework recommends using the Application Wizard when possible.
Using the Application Wizard
The Application Wizard guides you through the steps for configuring an application, including any policies that you want to apply to accessing the application. Before starting, make sure that the connector you will use for this application configuration already exists.
To create an application with the wizard, click Resources > Applications from the top menu. Then click + Application and choose Application Wizard.
First choose whether the application endpoint is identified by an IP address or range, or by a hostname or suffix. Then follow these general steps, observing the instructions in the wizard to complete the configuration for individual fields. Also see Using the Create Application Dialog for additional explanations for the application configuration fields.
Step 1: Specify the IP address or address range or hostname or host suffix by which users will connect to the application. If you are using a different hostname or IP address to expose this app, expand the Advanced Settings and specify the internal address.
Next, choose the connector for this application, and click Continue when done.
Step 2: In the Tags & Policies step, optionally choose or create tags associated with this application. Tags can help you manage the configuration for multiple applications as a group. For example, if this is one of several internal IT applications you will configure, you can create a tag for those IT applications. You can then use that tag to assign and manage access to that set of applications for your organization's IT team.
By default, the wizard creates policies to route traffic through the connector you selected and which permits all access to the application. If desired, you can create or reuse existing policies for routing and permission here.
When finished, click Continue.
Step 3: Review the settings you configured. When ready to save your configuration, click Deploy.
Finally, review the summary of your deployment. At this point, you can choose a more descriptive name for this new application than its default.
Using the Create Application Dialog
To create an application manually, click Resources > Applications from the top menu. Then click + Application and choose Application.
The following dialog appears:
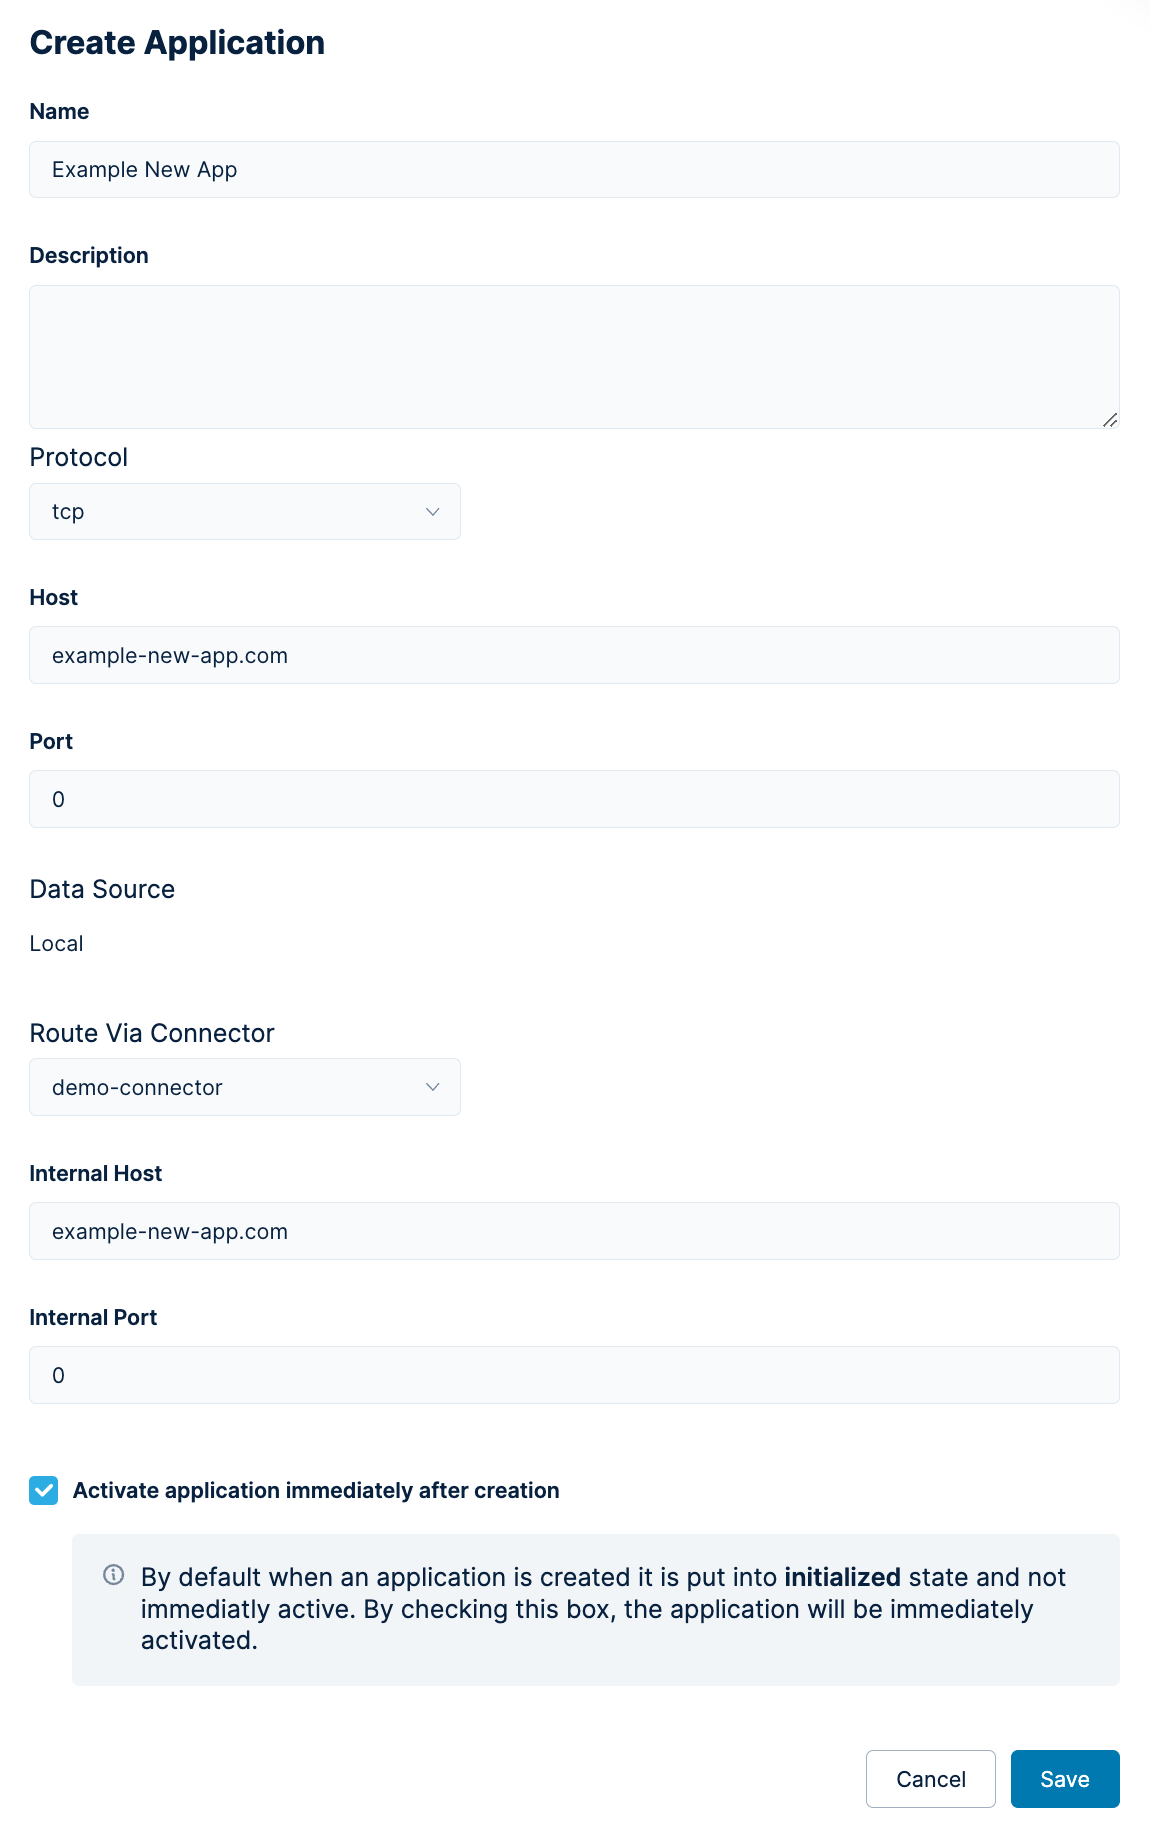
Enter the following information:
- Name - Provide a name for the application reference.
- Description - Add a description of the reference in the Description text area.
- Protocol - Choose a protocol clients use to connect to the application, from https, http, tcp, or ip. TCP is the most commonly used protocol, and allows all types of TCP traffic to this application. IP also allows UDP traffic to this application.
- Host - A host name, such as example.com. This is the host name that end users will use to access this application.
- Port - A port on that host. Note that Port 0 refers to any port on that host, or even Port 0 of any subdomain of that host.
- Route Via Connector - If this is a private application, you will need to choose a connector through which to route traffic to this application.
- Internal Host - Enter an internal host name. The internal host name can be:
- The internal DNS name or IP that the connector will resolve if you have chosen a connector, or,
- The host name or IP that will be resolved by your DNS server in case you haven't selected a connector. Such host names can be internal or external to your network. Leaving this empty will result in the Host value being stripped from the hostname before the request is sent.
- Internal Port - An internal port number, that is, the port of the host specified as the internal Host. Again, Port 0 refers to all ports on the host.
- Activate Application Immediately After Creation - Choose whether the application configuration is active or simply initialized. You must check this box to activate this application configuration. Users will not be routed to the referenced application through Lacework Edge until the application configuration state is active.