Users
Lacework Edge integrates with external identity providers, so that you can import user identities and provisioned access controls from existing user management tools. You can also create local user accounts individually.
For information on integrating identity providers and setting up single sign-on for your users, see SSO/SAML Integration. Also, for information about guest users (users who have the Lacework Edge client but do not have an account or are not logged in), see Guest Users.
Viewing Users
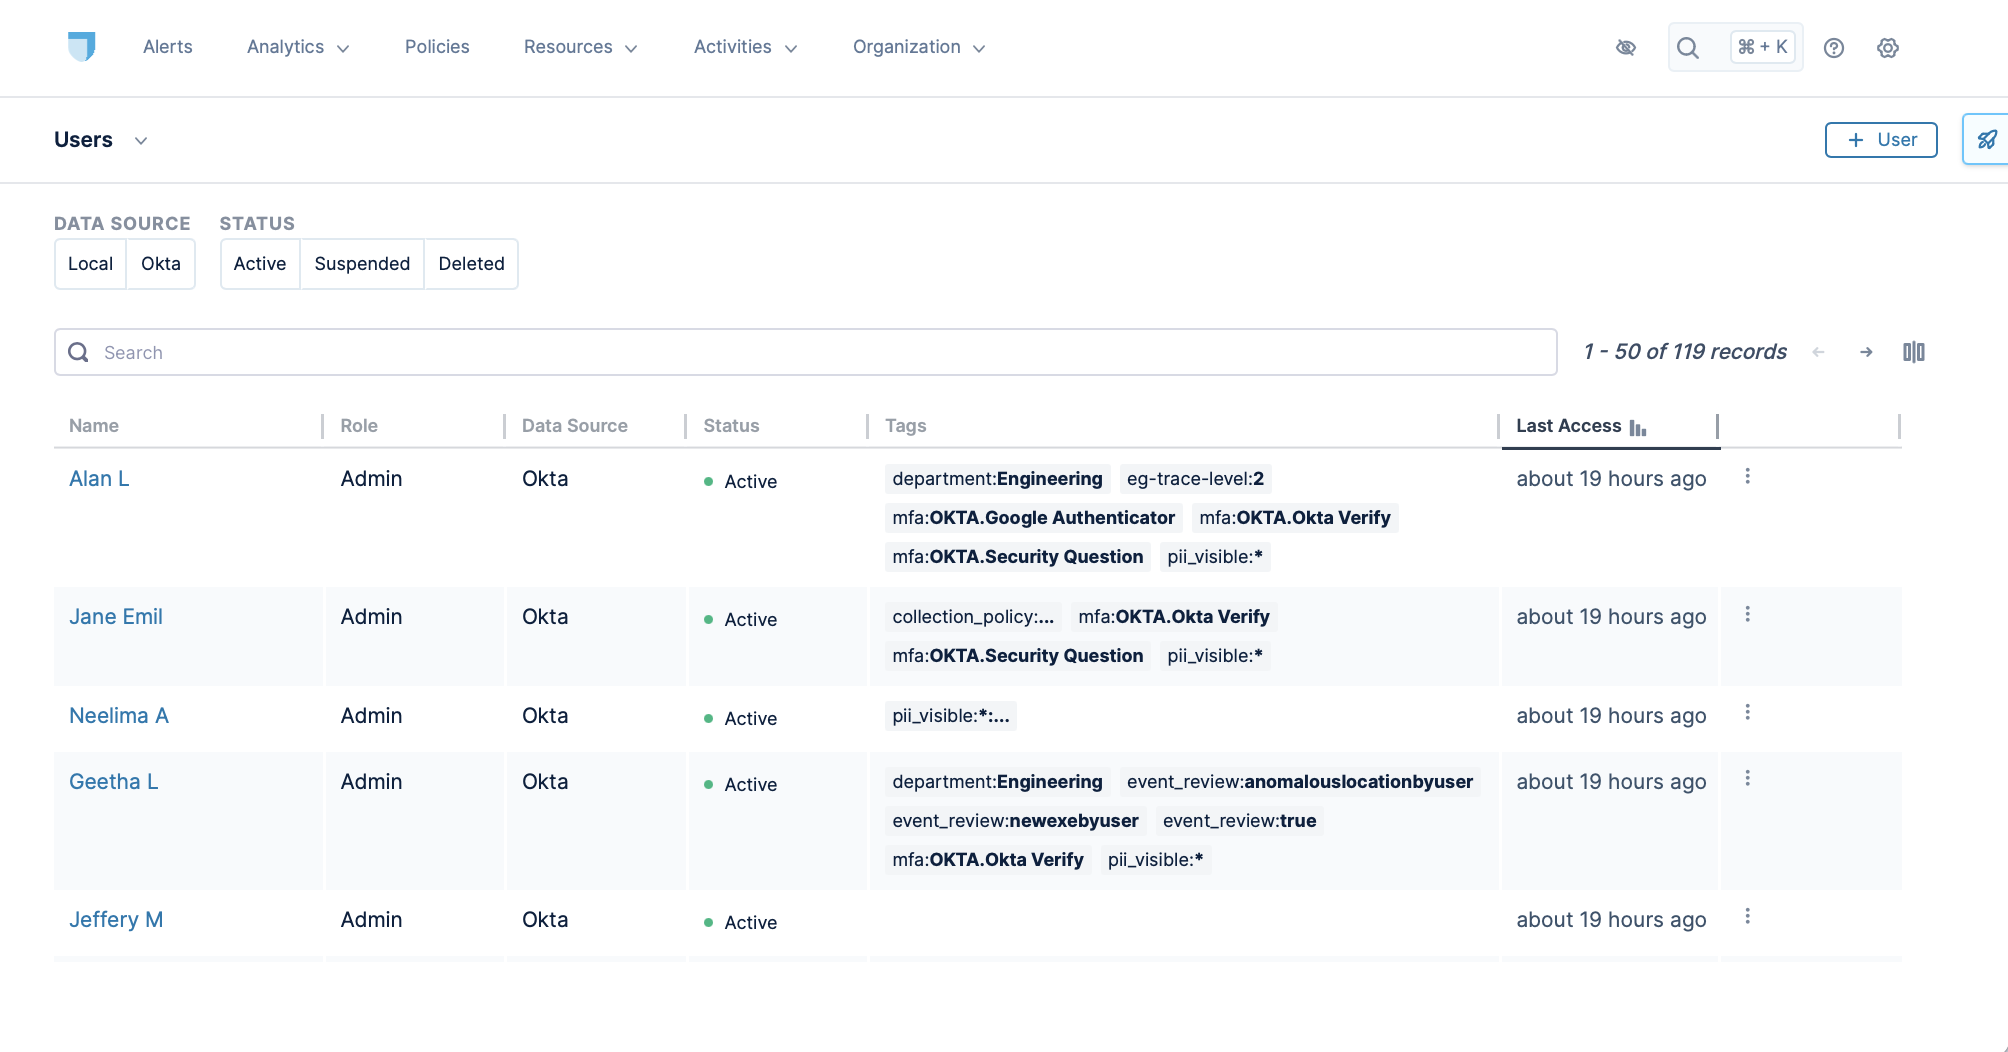
To view users in Lacework Edge, click Organization > Users. The user list appears as follows:

Lacework Edge displays user names, roles, data sources, tags, and the amount of time since their last access. Click the vertical ellipsis ⋮ in the last column to edit a user's account, collect diagnostics, or disable tracing for the user.
User Roles
Lacework Edge supports the following roles for users:
- User: provides access to log in to the Lacework Edge client. This is the default role for users imported from an Identity Provider. It is most common for the majority of your users will have this role.
- IT Admin: provides limited administrator access including usage the Lacework Edge client, configuring integrations, viewing and modifying policies and workflows, and limited viewing of user activity.
- Admin: provides full access to the Lacework Edge system including utilizing the Lacework Edge client, configuring all aspects of the system, and viewing all available data for all users.
Adding a New User
You can add a new user in the Lacework Edge console to create a local user account. A local account is stored within Lacework Edge itself, rather than in an external identity provider. For scale and manageability, we recommend using an external identity provider, but local accounts may be useful for testing or investigatory purposes.
To add a user, from the Users page click the + User button. Lacework Edge displays the new user form.
Enter the user's first and last name, email address, and then select the user's role from the User Role dropdown. You can send an email invitation by checking the Send Email Invitation checkbox and clicking Send.
Searching and Filter Users
You can search for a specific user by simply entering the first few characters of their name in the Search bar and Lacework Edge will display any matching names as you type. Click the user you're interested in when their name appears to view their details.
You can also filter users by data source and status by clicking on the desired buttons.
User Details
From the Users page, click on a user's name to view details for a specific user.
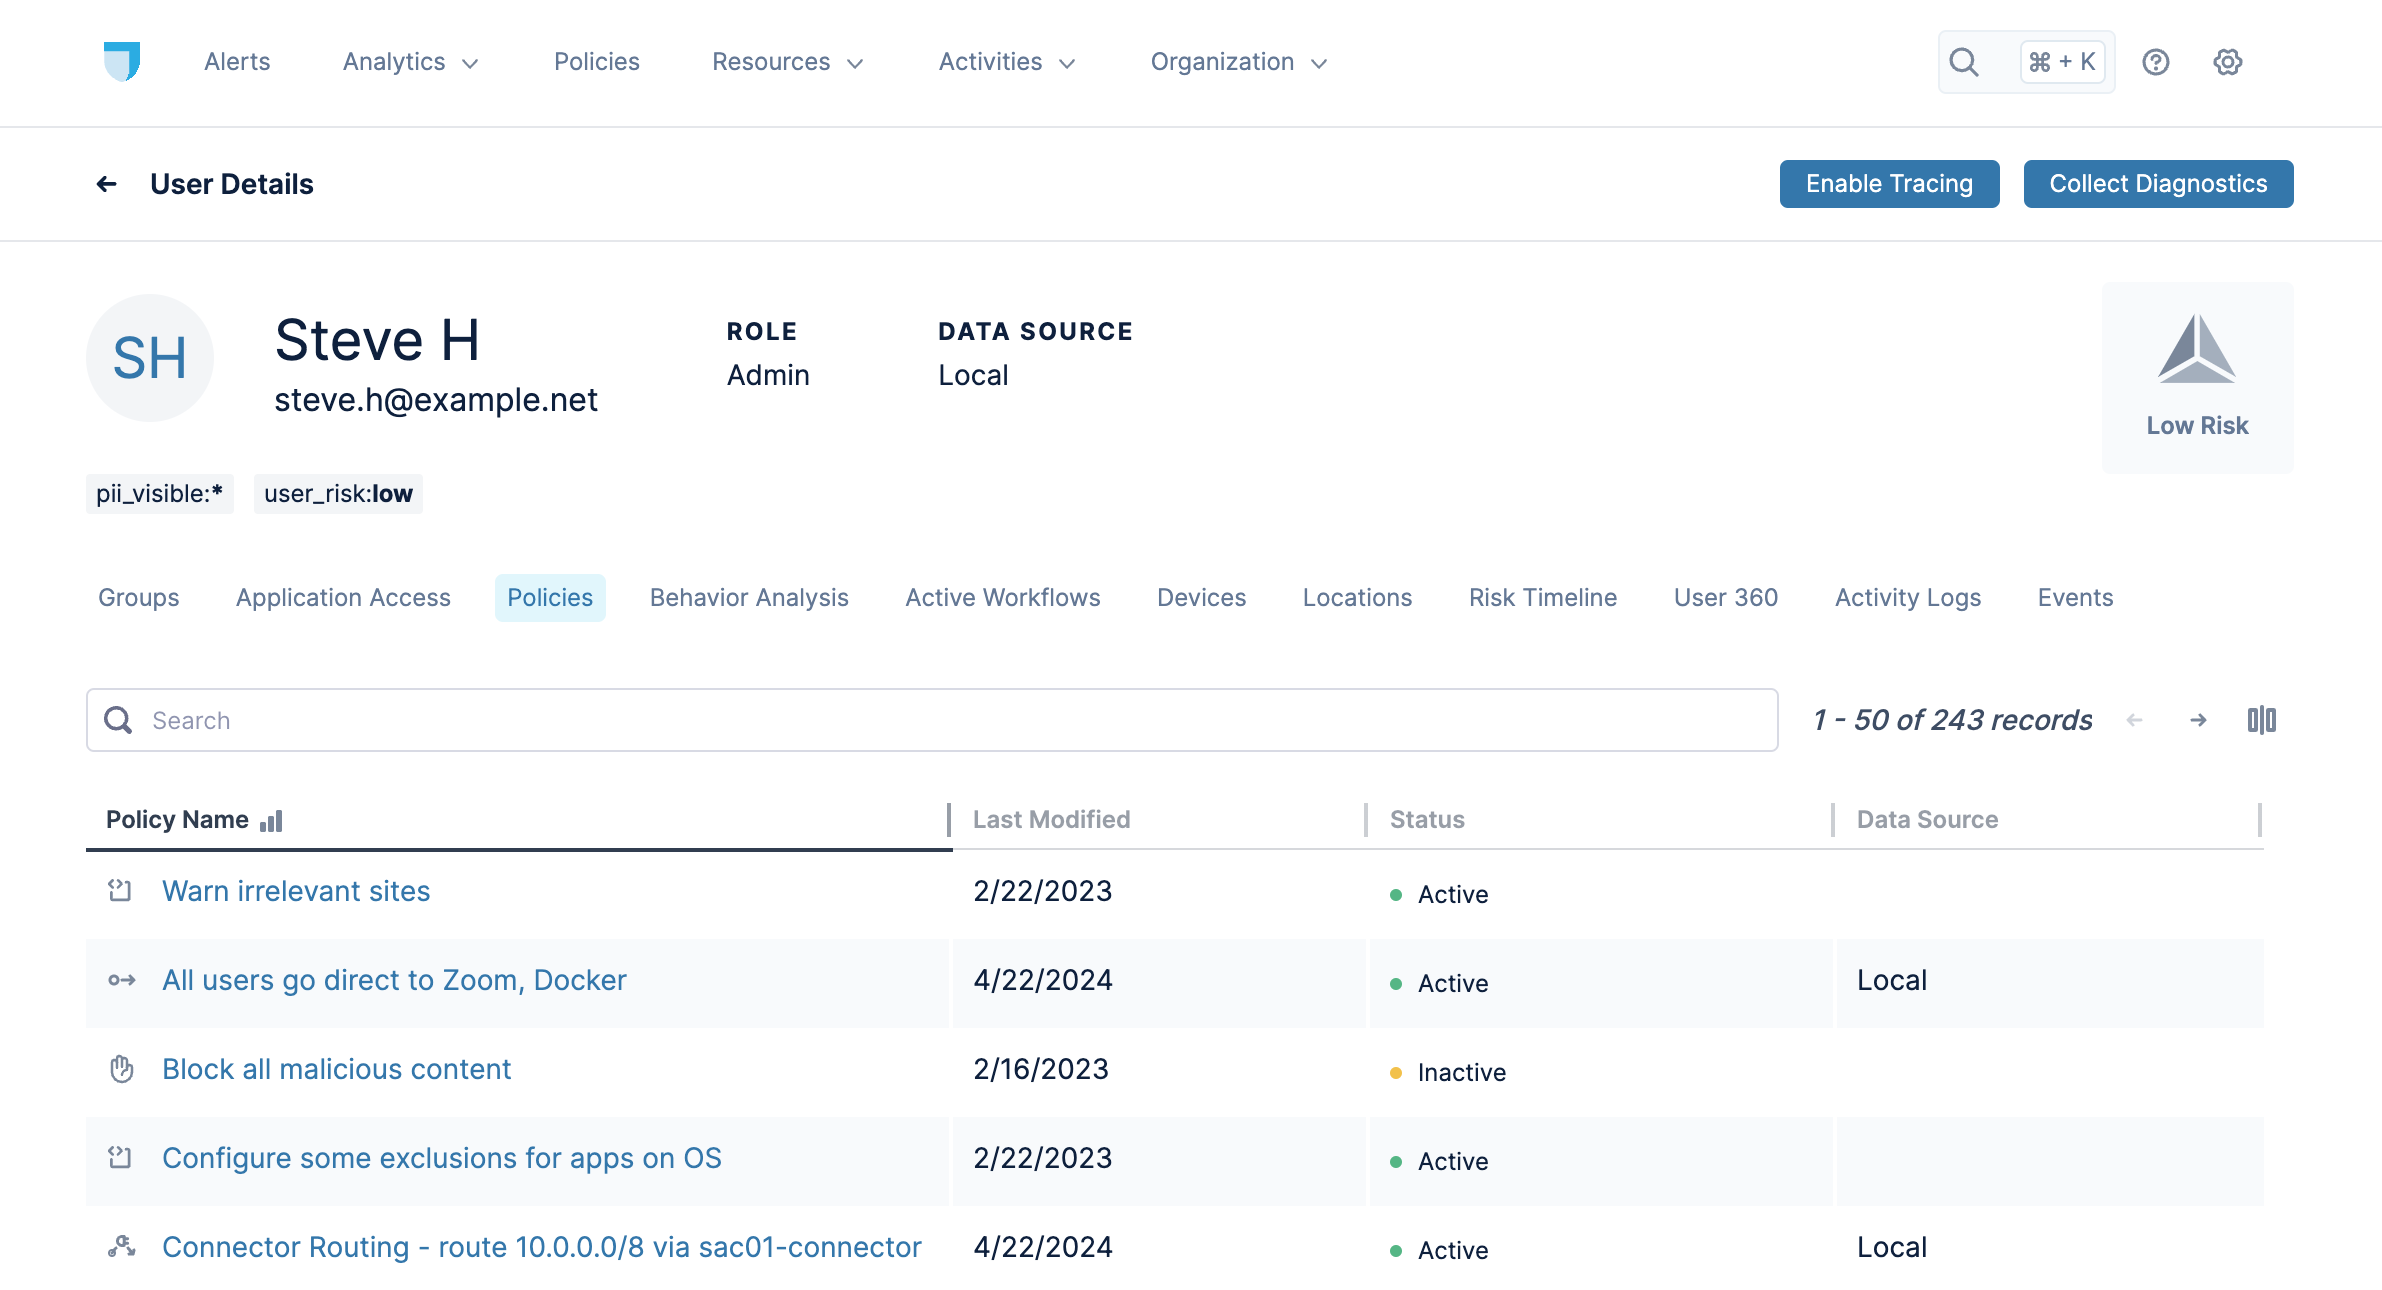
Lacework Edge gives a broad view of a user's activities across many categories (shown as clickable tabs), including their Groups, Application Access, and Policies. The following sections give additional information on each of these tabs.
Below are the details for an example user's Policies.

Groups
The Groups tab lists the groups to which the user belongs.
Application Access
The Application Access tab displays the applications that the user has access to, either by direct assignment or through groups or tags.
Policies
The Policies tab displays the user's assigned policies. Clicking a policy name navigates to that policy's details, where you can also edit the policy.
Behavior Analysis
The Behavior Analysis tab displays a diagram that relates a user's access to applications by their time of use, their location, and the device with which they accessed the location:

The behavior diagram consists of a directed graph in which nodes are connected.
Active Workflows
The Active Workflows tab displays approval requests made by the user that are still awaiting approval. More often than not, you'll find that a user does not have any outstanding workflows, in which case the No Data message appears.
Devices
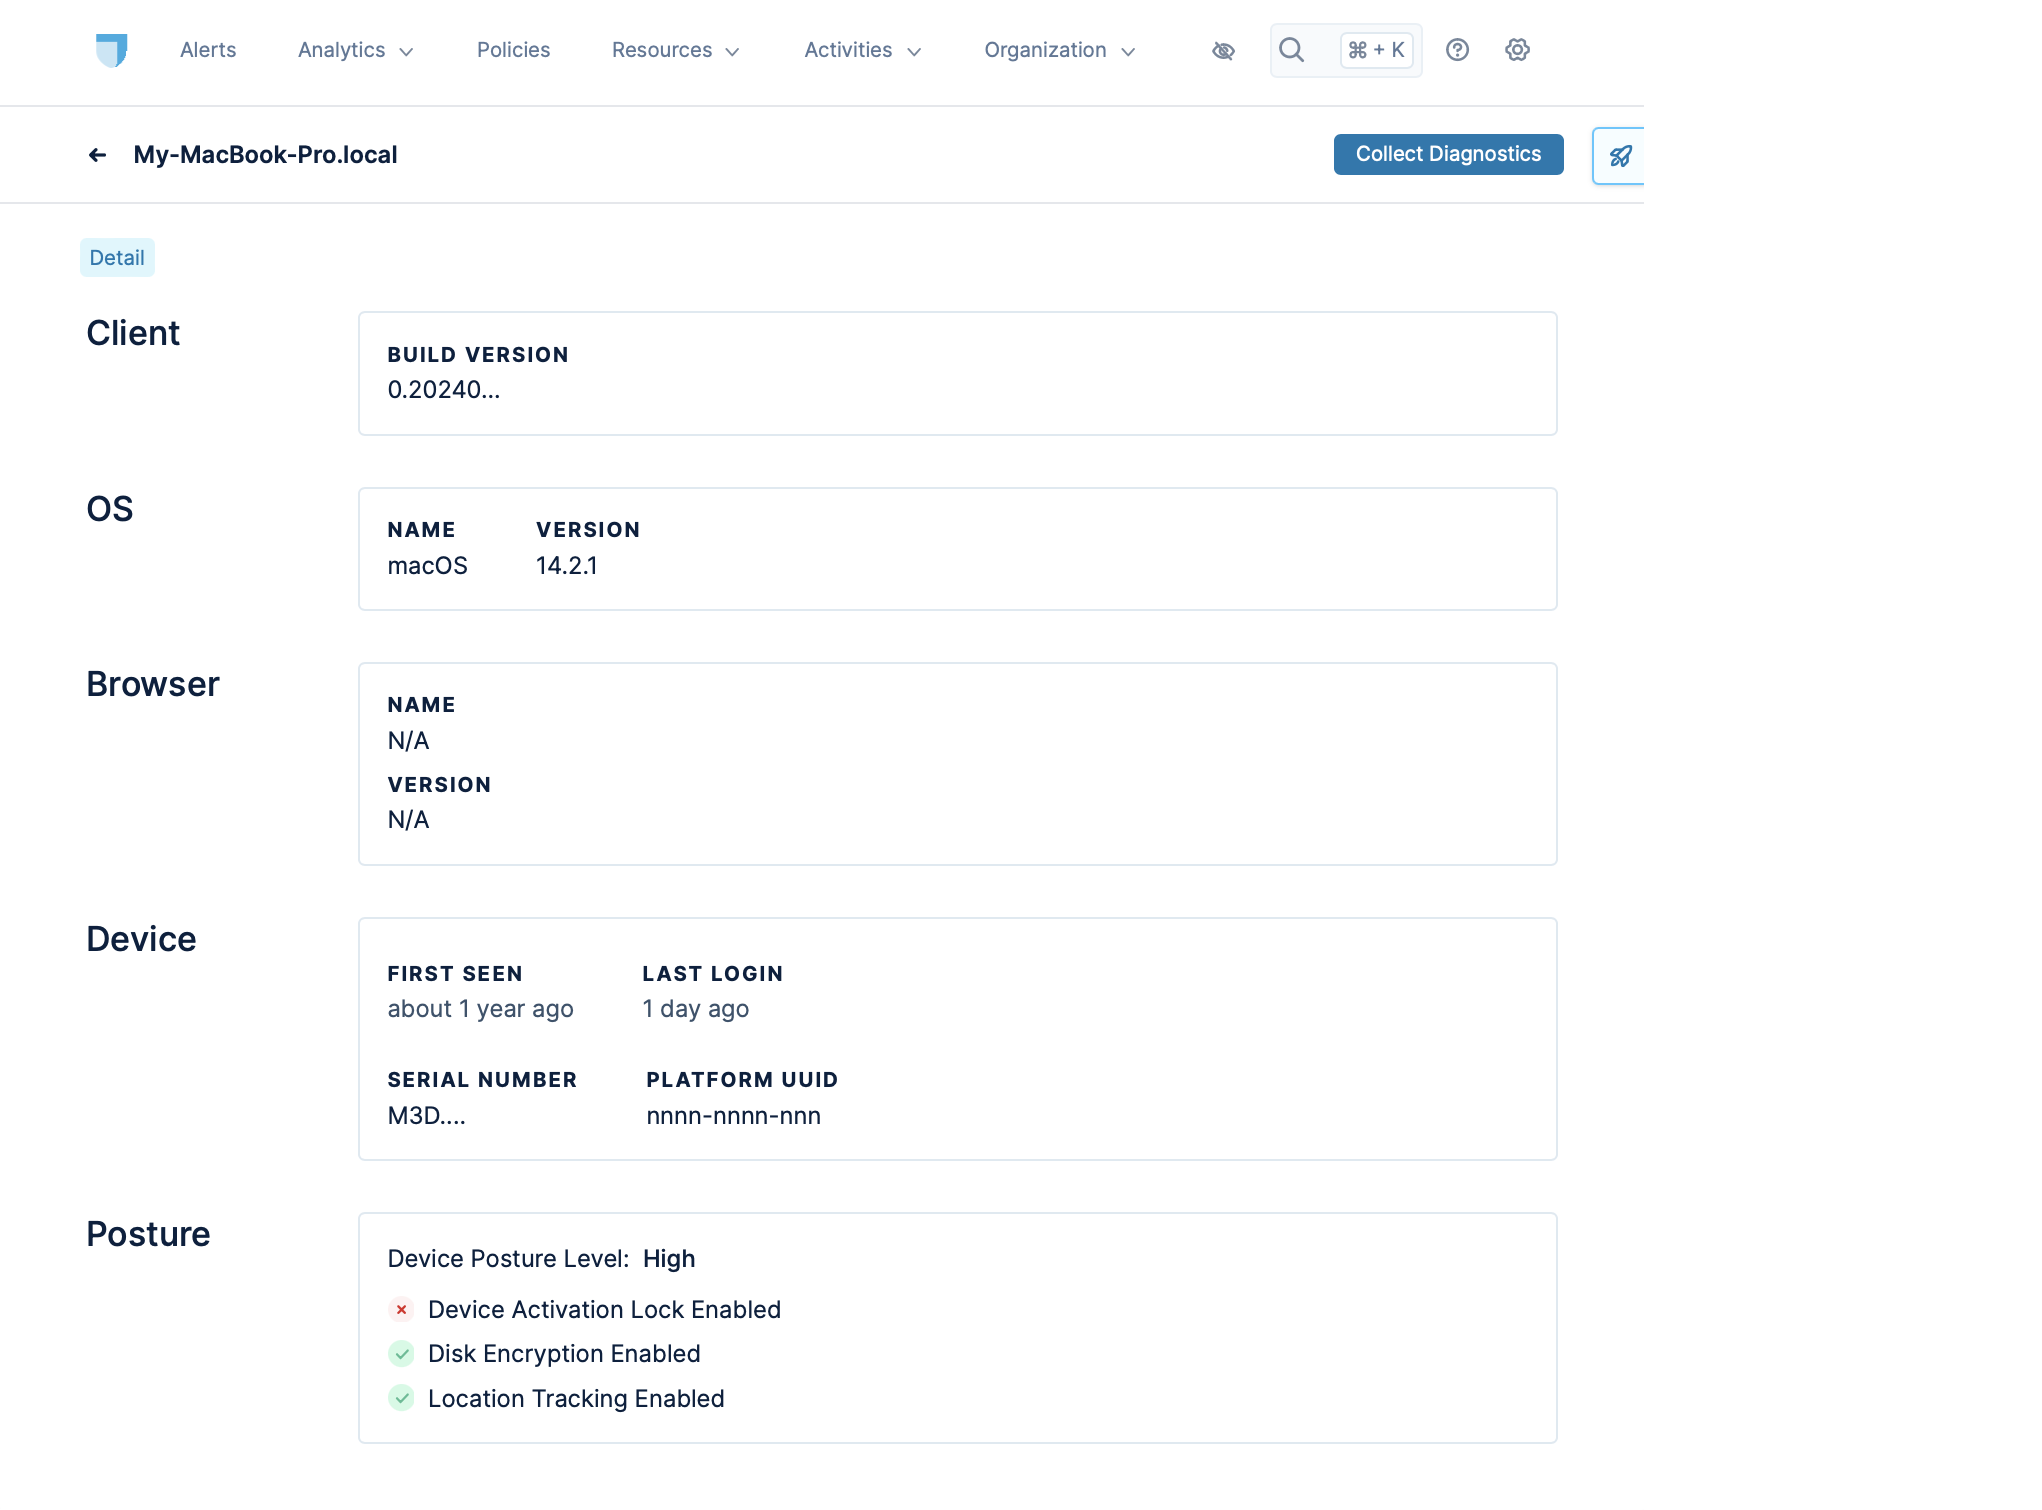
The Devices tab displays a user's devices. Clicking a device displays details for that device, including the security posture for that device.

Locations
The Locations tab displays a user's location information (if it exists).
Risk Timeline
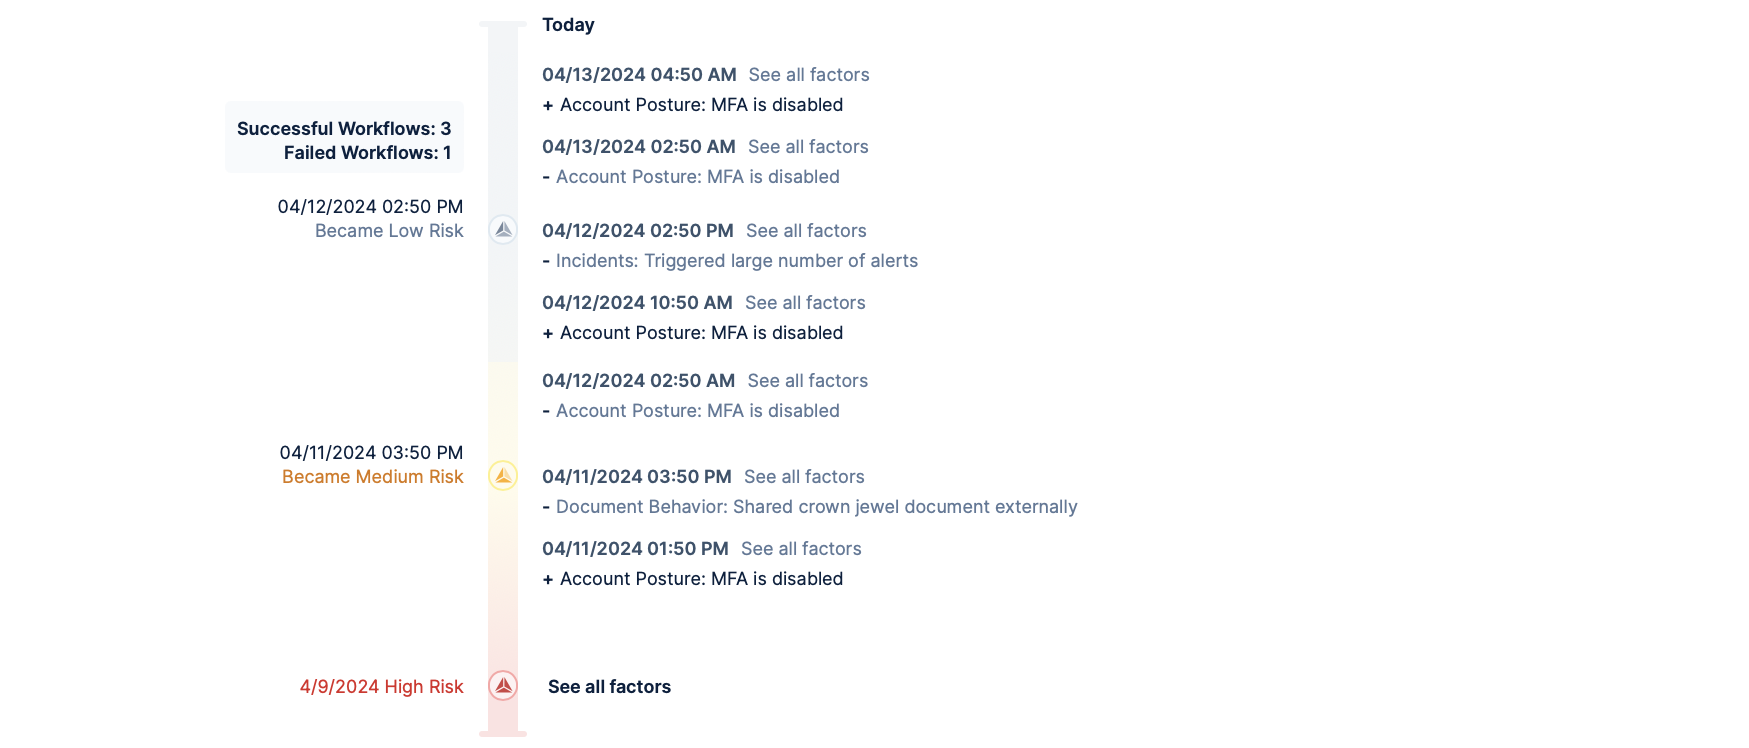
The Risk Timeline tab displays the events that have contributed to this user's risk factor, as shown:
